It’s All About Adjustment….

2017 was certainly a whirlwind of events for me, but I am back and ready to share new recipes!

Of course, those recipes may need to be slightly adjusted now. You see once our son Maxwell was born and I had taken to nursing our son rather than formula feeding, Matt & I ran into some potential dietary issues. As I could eat anything I wanted, Max’s digestive system had not yet developed and he started to exhibit signs of discomfort. One night of screaming baby and a pediatrician’s office visit later the culprit was simple: Mommy’s eating habits were taking its toll on the little guy. The only solution available was to start eliminating foods from my diet and see how it would affect Max in the long run. First to be eliminated were dairy and soy.

Now for those of you who aren’t aware, trying to go dairy and soy free felt damn near impossible at first. Why? Because if you read the labels on several of your favorite foods, you will find either one or both of those ingredients in it. Bread, bagels, frozen waffles, Onion Soup Mix, Gravy Master, Chicken & Beef Broth, most Asian cooking, Coffeemate flavored creamer, etc.–I had felt as though I was being put in food prison yet again. The first time for gestational diabetes in my third trimester, which is another story.

But I was determined to breastfeed and so I took to the task of restructuring my diet. Matt & I discussed more fresh food options for our meals. I incorporated more protein into my diet and cut out dairy in cooking. I read the labels on the current items in our pantry to understand what I could still incorporate into my diet. (Happy to report that pasta is still a possibility for me!) When I went food shopping I ventured into the specialty food aisles for myself. And while Stop & Shop has a limited selection of specialty foods, I was still able to pull together enough items to create my own menu.

Yet I missed baking….and unfortunately a lot of my recipes called for items such as milk or butter in the ingredients. I didn’t even bake my annual New York Cheesecake for Christmas Eve because I wouldn’t have been able to eat it. Fortunately though, Max’s condition began to improve and he didn’t look as pained as he used to. If me giving up dairy and soy meant that he would be happy, then I would do that for him.

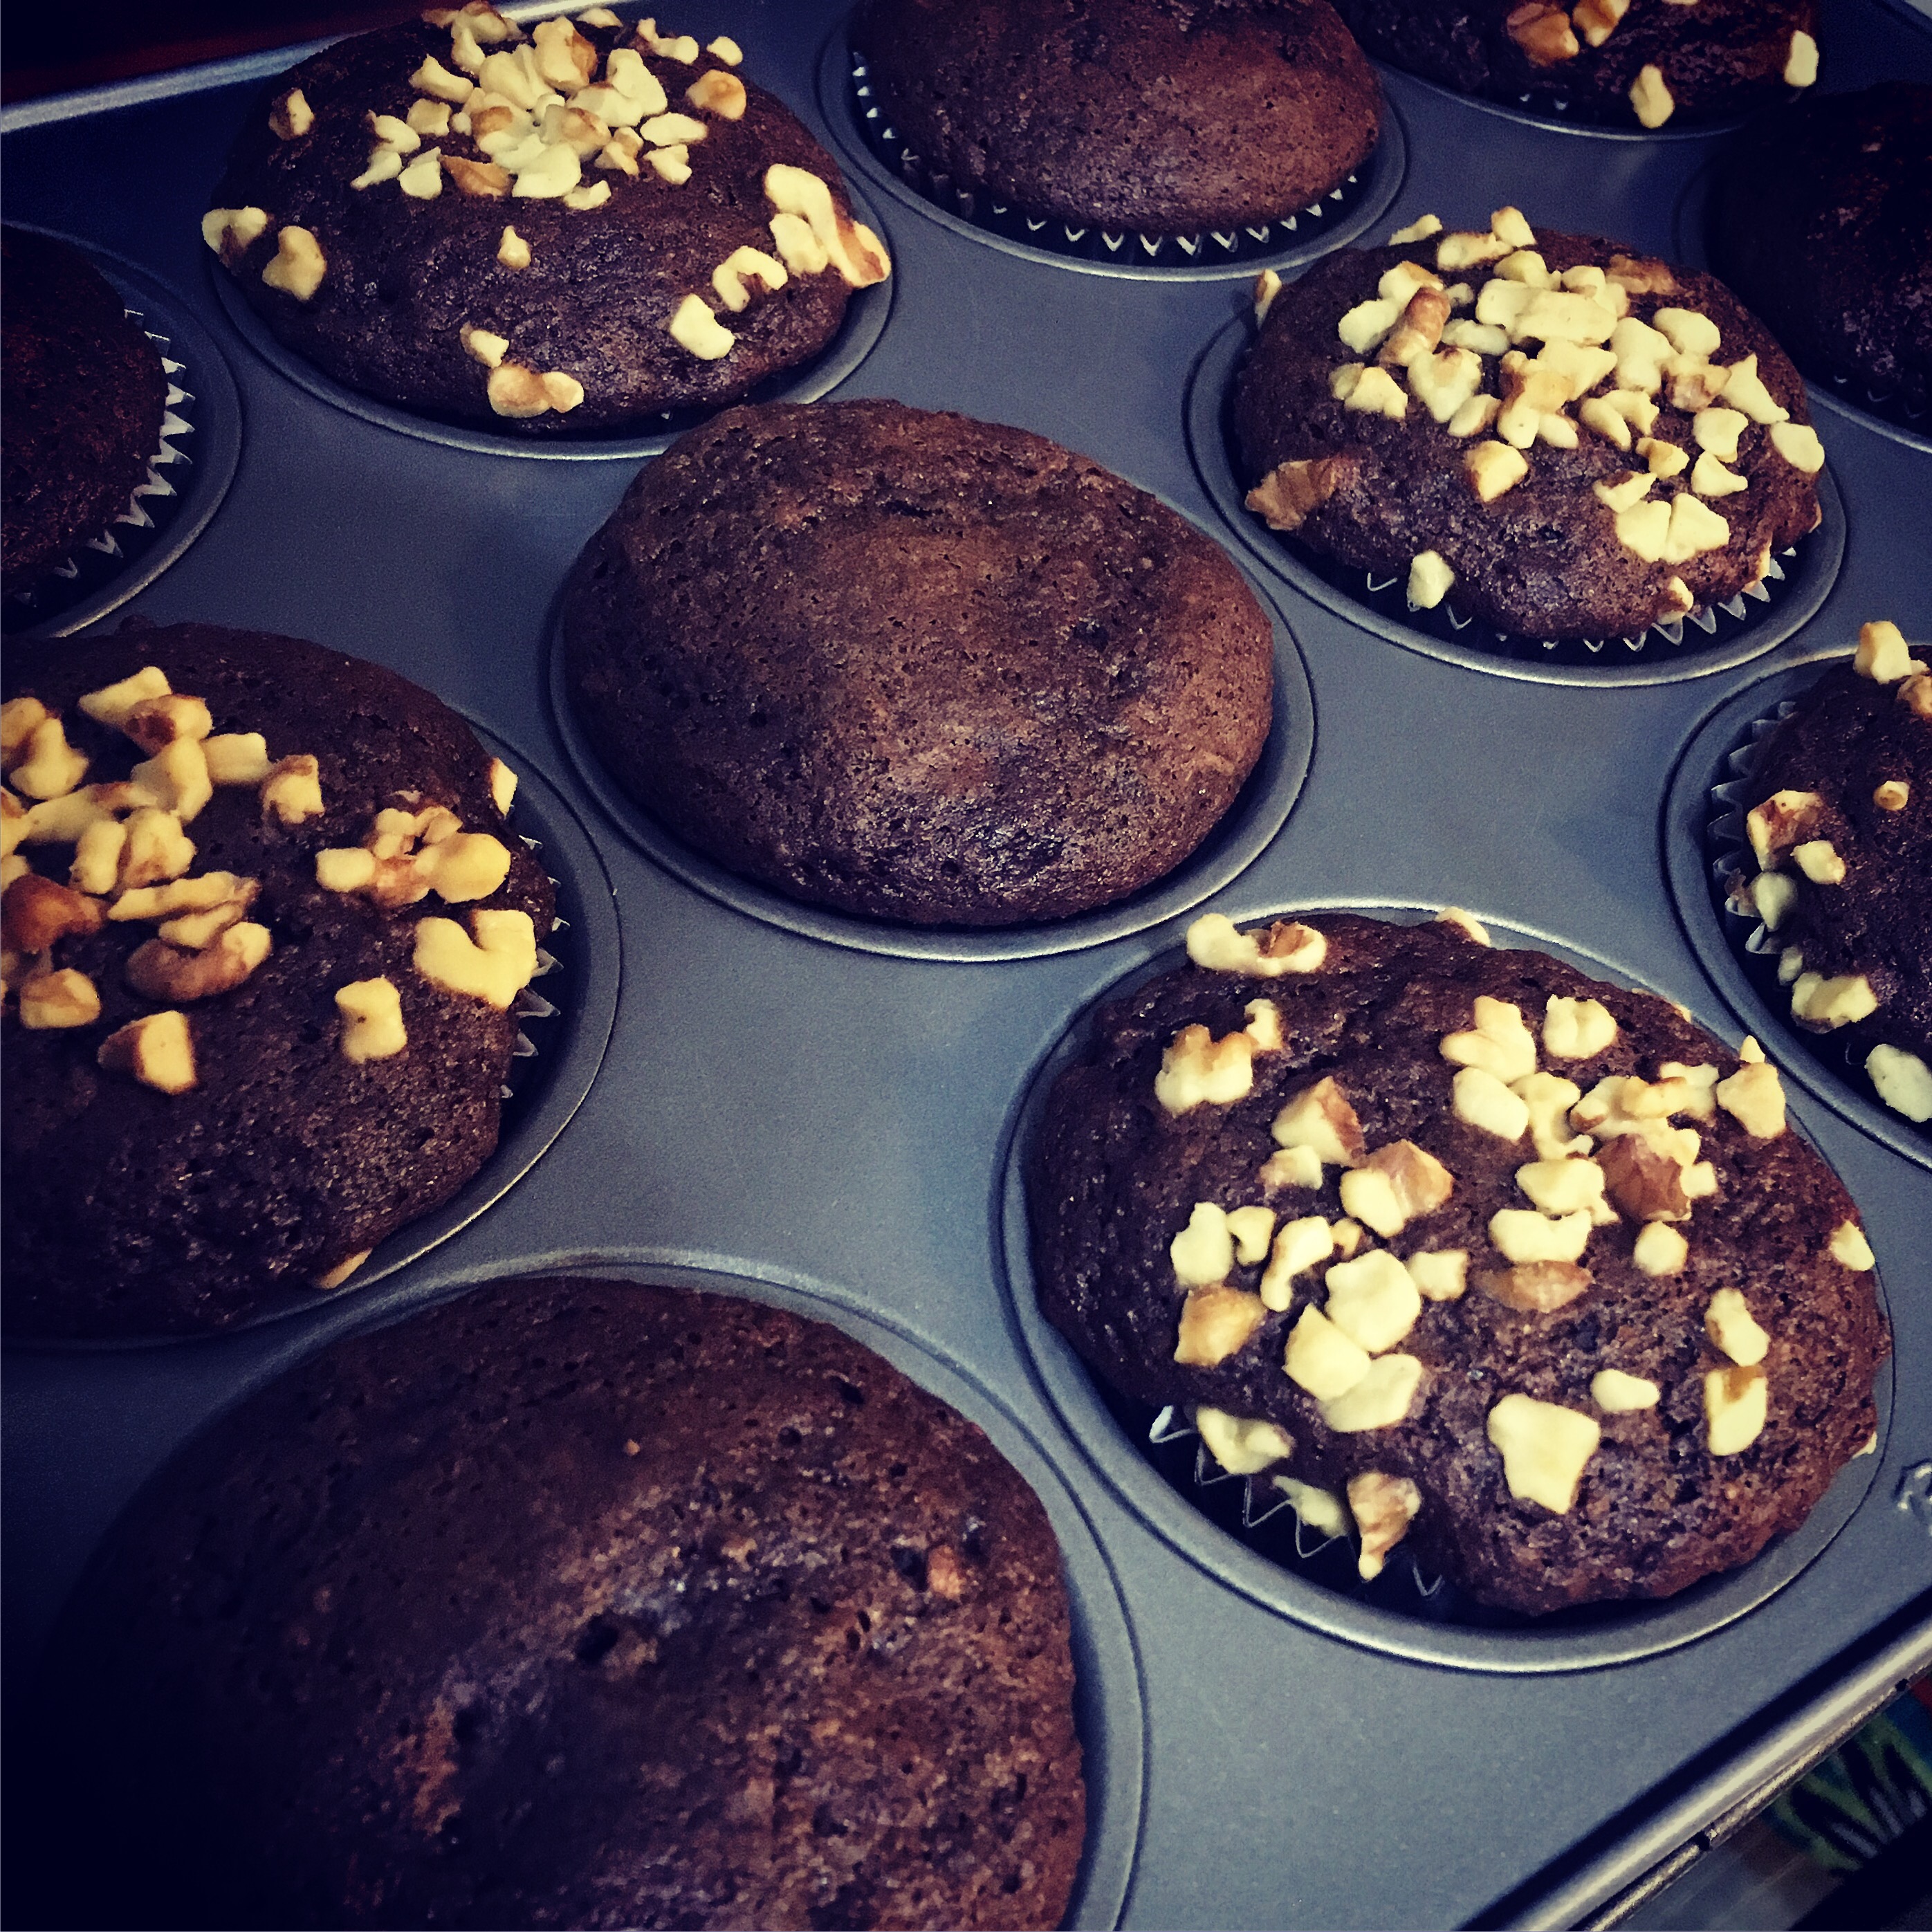
As an alternative, I started to really take a look at my baking recipes and find ways to substitute ingredients for the troublemakers. Now for those who remember one of my specialties is Banana Chocolate Chip muffins. You can find my recipe for that here: A muffin a day makes a happy husband! Of course that has milk and chocolate chips (with milk in them) so I substituted the regular milk for rice milk (you can also use almond milk if you’d prefer) and instead of Nestle Chocolate Chips, I found the Enjoy Life products have created an Allergy-Friendly chocolate. With those two substitutions I made my muffin batter, poured it equally into the 12 baking tins, and prayed that they would come out just as good as my original recipe….and they did!

So my advice is this: when you can substitute to make it more allergy-friendly, DO IT! I promise it was difficult to tell the difference in these muffins versus a regular batch.

And as always….enjoy!

– Jenny V

Advertisement

Spicy Tips: Chocolate Up Those Muffins!

So as I posted in an earlier post, Matt has this deep love affair when I make Banana Chocolate Chip Muffins. It’s quite ridiculous, actually. If I make a dozen, they’re sure to be gone within 24-48 hours with no exceptions. Mind you, this is 12 muffins. TWELVE. I would be lucky if I get at least one to try and even then Matt jokes that I only left him less than a dozen.


As luck would have it one day, I had super ripe bananas sitting in the fridge. The cold tends to help keep the bananas in their ripe stasis. And while I would normally just make plain banana chocolate chip muffins, I decided to try out a little chocolate experiment. Now, I make these brownie cookies that are downright sinful (but absolutely delicious). To that recipe, I usually add cocoa powder to give the batter this great chocolaty consistency.


Since Matt already loves that my muffins have chocolate, why not use some cocoa powder and make them double chocolate banana muffins? When using cocoa powder, the easy way to incorporate it into a mix without drying out the muffin is to adjust the amount of flour. For example, my recipe calls for 1 1/2 cups flour. If i put in 1/4 cup cocoa powder (which I did), then you only use 1 1/4 cups flour. It’s really that simple.


The result ended in Matt mentioning how the cocoa powder took a little bit of the banana flavor away, but made it almost like a muffin/cupcake hybrid. I think my next cooking endeavor might be to add a cream cheese frosting to this. Or if I’m daring, possibly Rum Chata frosting could be an interesting twist.


For my original post about muffins so you can try out this recipe, click here: A muffin a day makes a happy husband!


And for those who didn’t get the chance to see my “chocolatized” (yes I made that word up) muffins:

 Enjoy!


– Jenny V

Going “Swiss” on a classic….

If there’s one thing Matt knows about me, it’s that I have a love for certain foods.

Pickles, Fried Chicken, Sushi, Mashed Potatoes, Cauliflower, a nice rare Steak, Fresh Berries, and most importantly…..Macaroni & Cheese.

I know, not all my options are exactly healthy, per se, but I love my comfort foods just the same. There’s a decadence in them that I only indulge in when I am in need. (i.e., womanly issues, long day at work, etc.) I’m not one to reach for mountains of chocolate. I’m more the one to reach for a nice heaping bowl of mashed potatoes or homemade mac….and sometimes the occasional delivery of sushi.

But Macaroni & Cheese can occasionally get boring, so playing with the flavor combinations are quite fun when you get the chance.

For Valentine’s Day, Matt and I are not big on going out and spending an exorbitant amount of money on a meal we can make at home. No. In fact, we prefer to cook that decadent meal in the comfort of our home.

I had been toying around with the idea of a Bacon & Swiss Mac & Cheese for a while now. While I’m not a fan of cold Swiss (like my husband with a roast beef sandwich), melting it has yielded some tasty meals, namely Chicken Cordon Bleu. So why not to Macaroni & Cheese as well?

Adding the shredded Swiss to the roux and milk mixture proved to be a delicious change: the bite of Swiss was tempered with grated Parmesan cheese and the saltiness of the bacon. The combination provided decadent flavors to a rather inexpensive meal. (And Swiss is a nice alternative to Gruyere, which can run you about $30/lb….indulge only when it will make or break the dish!)

Sometimes our favorites need a little bit of a facelift….and the result can be quite delicious!

Enjoy!

~ Jenny V


baconswissmaccheese

Jenn’s Bacon Swiss Macaroni & Cheese

1 box elbow macaroni

1 package shredded Swiss cheese

1/4 – 1/2 cup grated parmesan cheese

2 1/2 – 3 cups milk

2 Tablespoons butter

1 – 2 Tablespoons flour

1/2 package bacon, cooked until crispy and chopped into bits

1/2 cup panko bread crumbs

1/8 block Velveeta, cubed

Salt

Pepper

Directions:

1) Prepare pasta to “al dente”. Drain well and place in large glass baking dish. Sprinkle almost all bacon over the pasta and save a little bit for topping, probably around 1-2 Tablespoons.

2) Pre-heat oven to 350 degrees. In saucepan on medium heat, combine butter and flour to create a roux, then gradually add in milk. When milk starts to thicken, add in Swiss , Parmesan, and Velveeta, stirring until cheese has melted. Add in salt and pepper to taste. Once at desired flavor, remove from heat. (**Save a little bit of Swiss and Parmesan for topping**)

3) Pour sauce mixture over macaroni & bacon, mixing thoroughly until sauce coats all pasta. Sprinkle remaining cheese, bacon, and bread crumbs over the top, then bake in oven for 30-40 minutes. Remove and serve.

Spicy Tips: How to Move Your Halloween Candy (Without Throwing It Out!)

So if you’re like me and Matt, it’s the week after Halloween and you are left with copious amounts of chocolate in your home. We over-bought candy in ratio to the amount of trick-or-treaters in the neighborhood and as a result….were left with the majority of the candy we had purchased.

At first, picking up and eating a piece here and there is fine. Yet after a week of nothing but candy….I’m ready to scream!

But it’s alright, over-buying of Halloween candy seems to be a yearly tradition that all of us appear to go through. (And there’s only so many days in a row that one can grab for a Kit-Kat or Snickers without getting bored.) It reminded me of Thanksgiving, and how at Thanksgiving after we stuff our faces silly, the leftovers need to be “re-invented” in a way so that food is not wasted.

So with our large plastic bowl filled with all the candy that one can imagine, and as the baker in our house, I got to thinking about ways to make the candy move in more creative ventures….and that’s when I decided to make Halloween Candy Cookies.

Using the same recipe that we have to make Chocolate Chip cookies, Matt and I substituted the chocolate chips for M&Ms with chopped up pieces of Snickers and Milky Ways.

And the results? Absolutely delicious!

The caramel oozed out of the cookie just perfectly. And the nougat proved to melt just right into the batter, coupled with that crunch of peanut and candy shell. What we were left with was cookies….as Emeril would say….kicked up a notch!

So if you’re like me and you find that Halloween has left you with more chocolate than Willy Wonka….don’t be afraid to put that candy to good use and bake with it! Cookies, brownies, cupcakes, cheesecake–you name it, I’m sure you can (and will) find a great use for that candy!

And if you’re like me, already planning what to do with your children’s candy. (Or in my case: future children’s….when we’re ready. I sense bargaining in future years.)

Enjoy! (And happy baking!)

~Jenny V

A muffin a day makes a happy husband!

While my post is about a recipe that I found (gasp!), I do want to talk about my latest baking venture: muffins.

Yes, muffins! While I have mastered items such as cookies, cheesecake, bread, and brownies a million times over….I wanted to venture into more of a breakfast territory. Instead of Matt reaching for a cookie in the morning, what better item to have prepared in the house than a fresh batch of muffins? When prepared correctly, they’re light, fluffy, and that one word that seems to put some on edge when they hear it….moist. (I don’t get it, it’s a legitimate word and relevant for what I’m talking about.)

So with Matt away on yet another late night gig, I challenged myself to try making blueberry muffins. I mean, we had two containers of these beautifully ripe blueberries that without a recipe, I would just eat plain (or with chocolate chips). So baking needed to happen. Of course, I did my research on recipes and came across an easy recipe that only required tweaking the measurements to make a dozen rather than four dozen. Because, come on, what does a married couple do with four dozen muffins? I could feed my neighborhood on those! (Or possibly Matt’s co-workers at his seasonal job….they’re requesting muffins after I posted some provocatively delicious photos…like this one:)

The blueberry muffins were a hit! In about 48 hours since baking, those muffins were G-O-N-E….and so was all the milk. (Matt’s addiction to sweets only measures up to his craving for milk with those sweets.) And with the end of the blueberry muffins came the ever-inevitable request for more muffins. This time: banana chocolate chip.

I accepted the challenge and proceeded to diligently research recipes to find an easy and fun recipe for Matt’s ultimate craving. The result? A recipe that uses NO oil and tastes like a muffin that you would expect to be loaded with calories. (They’re not. They’re…..dare I say it? Healthy!)

So while this is not my recipe, I’m going to share it anyway via link. Because my batch of bananas yielded two dozen muffins that are practically gone within about four days. (Mind you, I have only had a handful and only a few of our friends got to try them before Matt went to town on the rest with a lifetime supply of milk.)

Click this link for the recipe: Banana Chocolate-Chip Muffins Recipe

I promise you: these WILL not last in your house!

And if you need a little bit more encouragement to make them….well….there is always this:

Enjoy!

~ Jenny V

A Slice of Jenn….

Just like meeting someone new, I believe introductions are in order.

Hi, I’m Jenn, and before meeting my wonderful husband (Matt, who you will probably read a lot about here)….I was cooking-challenged. Of course, I knew how to cook, thanks in part to high school cooking classes being made part of my core requirement, but to apply those skills?

Not so much.

Matt still makes the joke that I used to microwave hot dogs before him. (I still have on occasion…he has no idea how delicious they can be when you’re in a bind to eat something quick!)

So as our relationship progressed, so did I under Matt’s tutelage of cooking. He showed me the basics of knife skills, so that I could be his sous-chef. He taught me the importance of knowing how certain ingredients cook and why you should know the hot spots on your heat source. He demonstrated how to prep various meats. And most importantly, he was patient enough to show me these skills over and over again until I felt confident enough to try them on my own.

(I’ll tell you, I think it’s one of the many reasons I love him so much.)

With that said, our relationship grew in part to the way we cooked together. The ying and yang of the kitchen, so to speak. Food became less about takeout and more about finding new recipes to try.

When I got my KitchenAid, I was attempting to fine-tune my baking skills so Matt could have fresh cookies instead of the preservative-laden junk that has sat on the shelf for months. After cookies, we tried fresh bread and rolls. After that, pies and cheesecake….which I am proud to say I successfully mastered.

And especially after the bridal shower, we were finally able to take our cooking/baking to the next level with new gadgets to test out more advanced recipes.

Which brings me to here….why I decided to start a food blog. More and more lately, Matt and I have made it a point to try new creations, whether it be from a recipe or something that we come up with on our own. As Matt always reminds me, a recipe is a “snapshot” of that moment when it was made, and while it is good, there is always room to tweak it a little. (Except chocolate chip cookies….I think my husband is addicted to my recipe. Lol.)

So, come prepared with your appetite as I share some of our favorite dishes, new concoctions, and everything in between.

~ Jenny V