Francaise: Not just a chicken dish

While I am a healthy mix of nationalities (and according to my recent genealogy research a few I didn’t know about), I was practically raised by my dad’s side: mainly composed of English, German, and Italian family members. I can credit my family for being a key factor in my appreciation of food and cooking. And especially with Italian food, I have developed a rather particular palette. Because while I’m sure a good portion of the Italians I know would pick a tomato-based dish as their favorite, mine has always been and always will be Chicken Francaise. (Fortunately, the version of Francaise we made for this post does have tomato in it.)

In fact, I love Chicken Francaise so much that during my freshman year in college when the cafeteria had failed spectacularly in their attempt to make it (they added raisins and made it sweet….NEVER add raisins or make it sweet, it’s gross), I went home that weekend and asked my dad for an emergency dinner at one of our favorite Italian restaurants. I still shudder thinking of those raisins….I stress that they should NEVER be added to a savory, lemony dish…:::shudders:::…but I digress.

About three years ago, approximately April of 2013, Matt and I opted for takeout from our favorite local Italian joint. I remember the date because Matt encouraged me to order anything and everything from the menu for reasons unbeknownst to me. It was after the fact that he admitted that that was the day him and his mom were in a jewelry store picking out my engagement ring. That day in particular, I had a craving for Shrimp Francaise. I had tried the chicken, I had even tried a flounder version from one of our favorite seafood restaurants. But shrimp? Never.

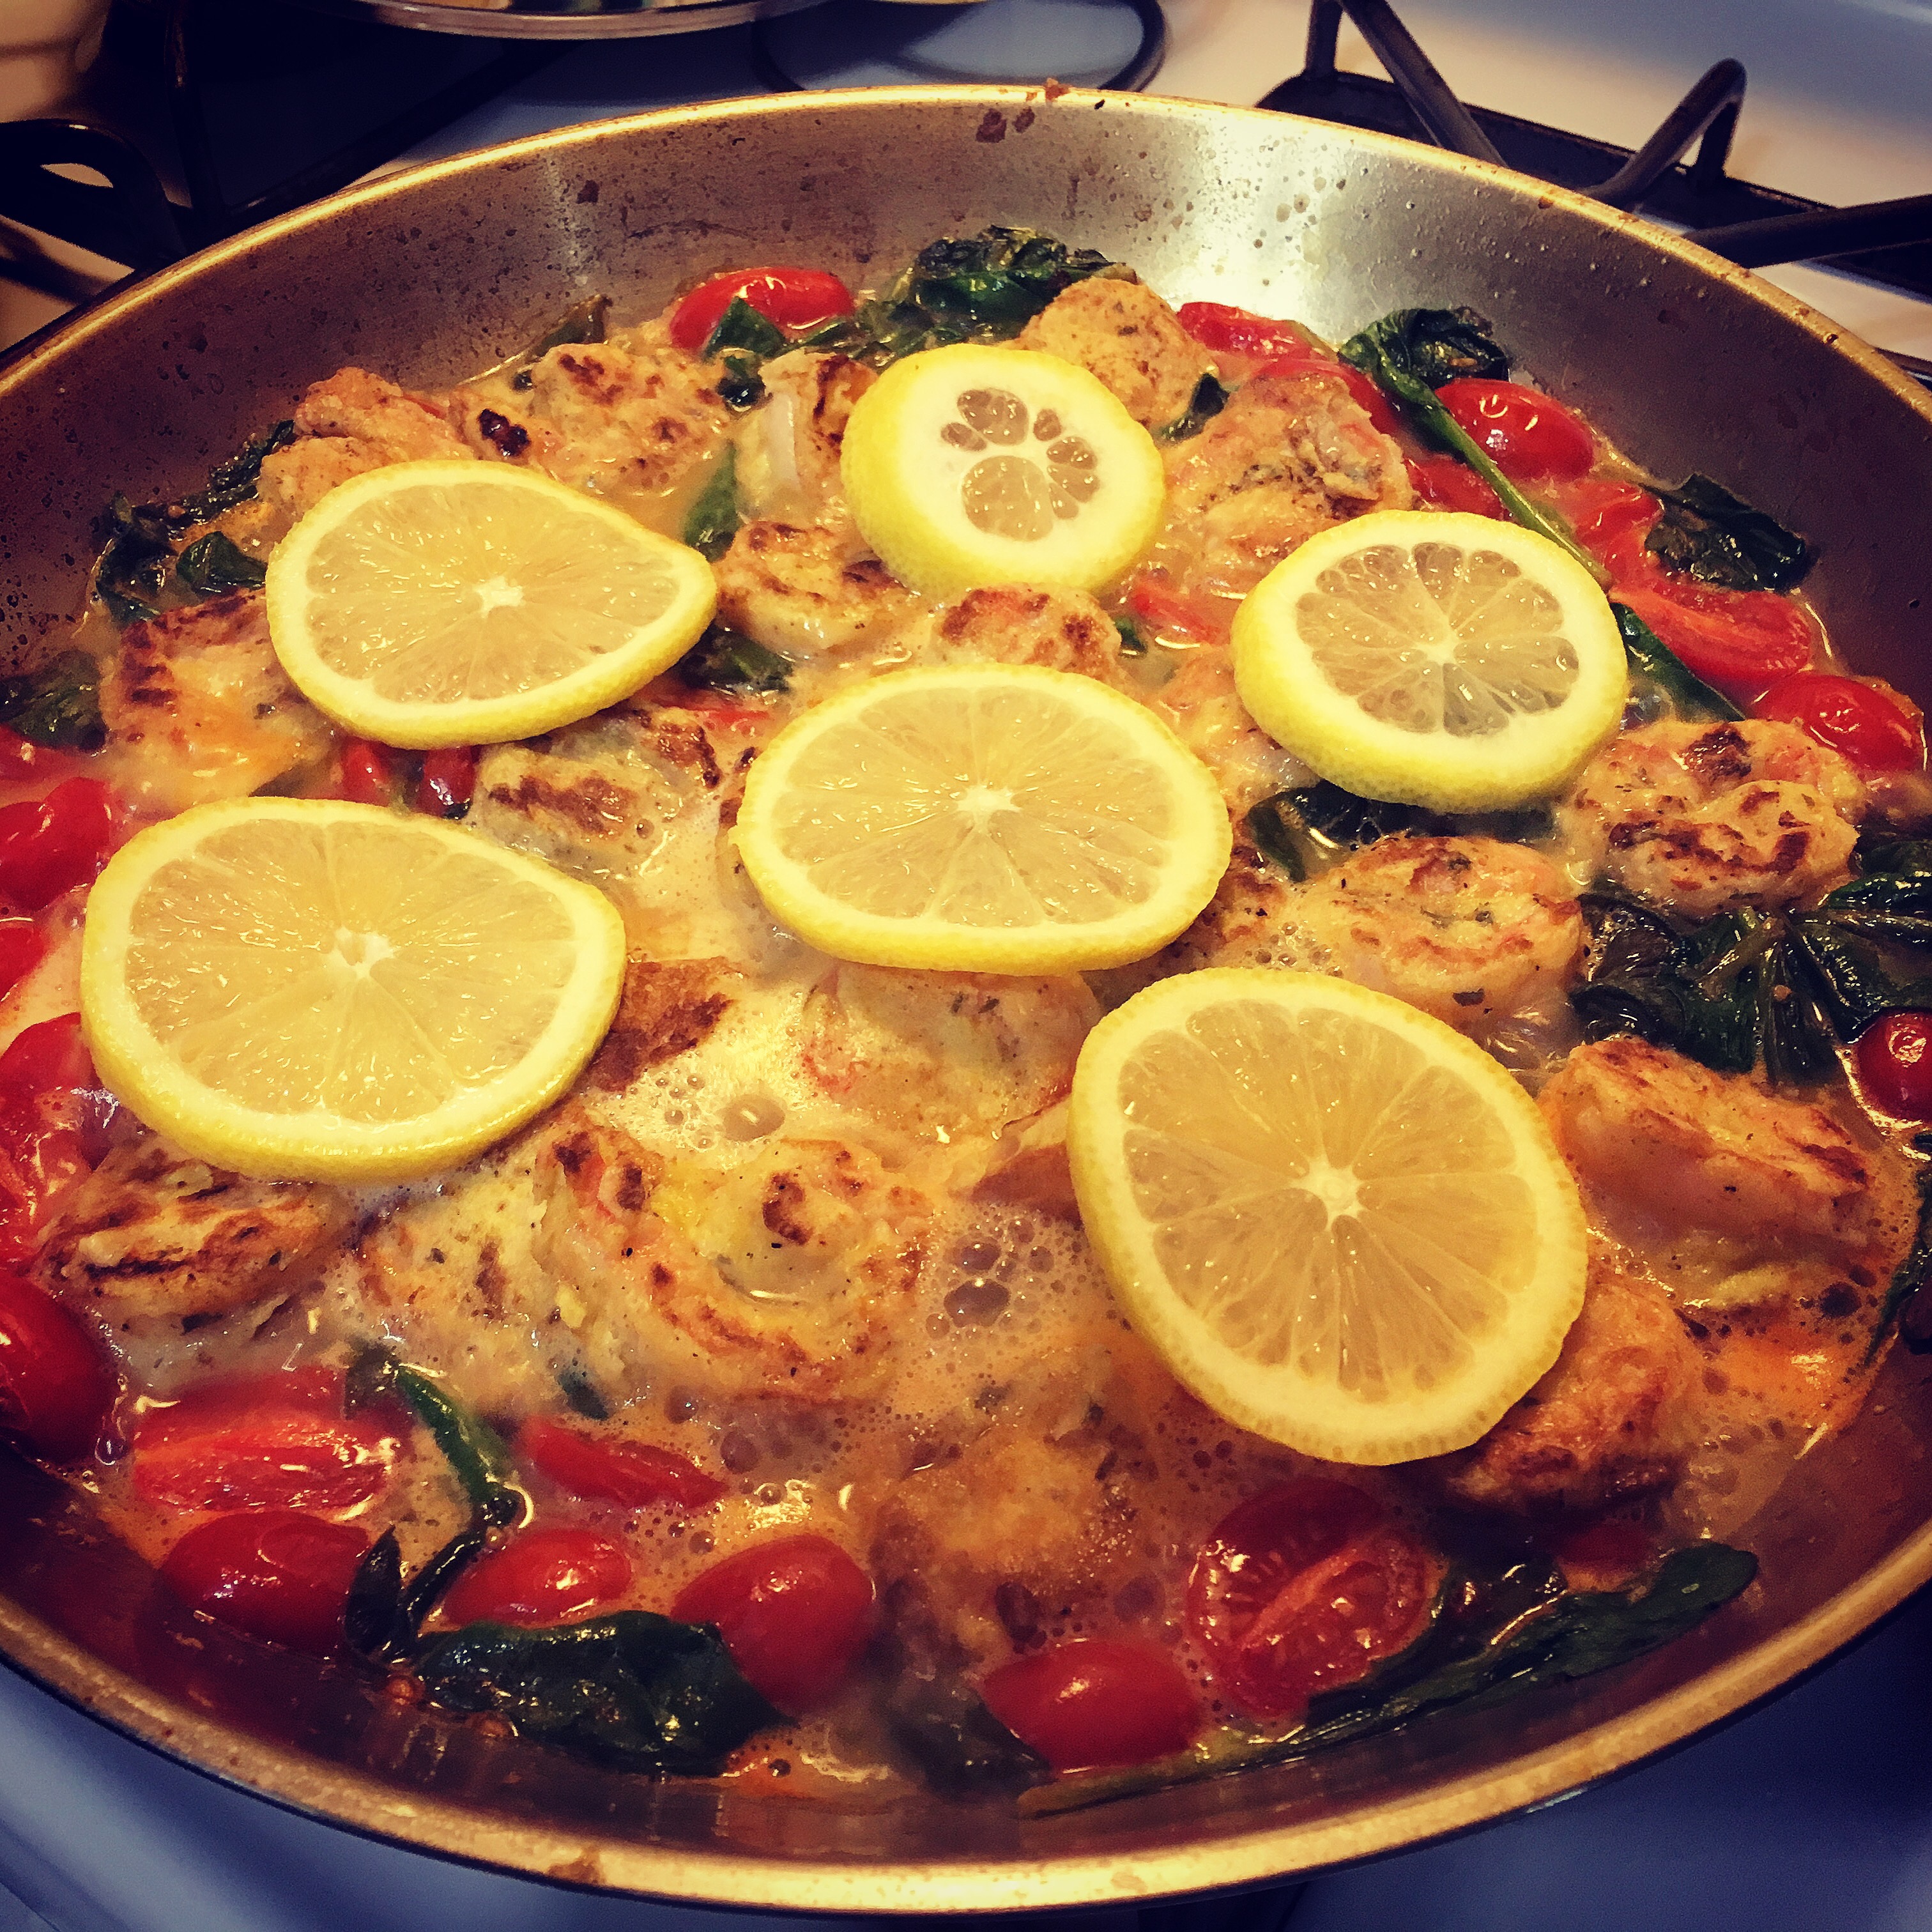
Fast forward to a few years later, Matt and I decided to try making Shrimp Francaise to add some new dishes to our repertoire. The end result was a delicious lemony and buttery seafood dream, with some fresh sauteed spinach and cherry tomatoes that were bursting with flavor! Seriously, cooked cherry tomatoes–look into it and do it. And as for spinach, buy it fresh in bulk and you will yield many meals: a nice salad, a sandwich topping, and of course, cooked in Shrimp Francaise.

Fun plays on classic dishes are always a great way to spice up your culinary technique in the kitchen. This one is definitely a keeper.

Enjoy!

~ Jenny V


Jenn & Matt’s Shrimp Francaise 

1/2 lb. shrimp, cleaned & fully peeled

2 eggs, whisked

1 lemon, juiced

1 tablespoon lemon juice

1/2 lemon, sliced thin 

1 container cherry tomatoes

1-2 healthy handfuls fresh spinach

1/2 cup white cooking wine

1 cup chicken broth

1 – 1/2 cups flour

1 tablespoon flour

1 tablespoon butter

1-2 tablespoons paprika

1/2 teaspoon black pepper

Salt, to taste


Directions:

1) In a small bowl, mix in eggs and tablespoon of lemon juice. In a small pan, mix flour, paprika, and black pepper. Dredge each shrimp through flour mixture, then egg mixture. Place shrimp in pan over medium high heat with a little oil in pan. Brown on each side and let it cook almost all the way through, then remove from pan.

2) Into pan, add tablespoon of flour and butter to create a roux, then add white wine, chicken broth, squeezed lemon juice, and tomatoes. Before the tomatoes begin to burst, add the spinach and shrimp. Place lemon slices over top.

3) Cook until spinach begins to wilt and  tomatoes burst. Remove from heat, season with salt if desired, and serve over pasta.


Advertisement

A “Creamy Italian” twist on a summer standard

When summer hits, Matt and I are notorious for the cold salads, as you could tell with my last post about potato salad.

But our main summer salad? Macaroni salad.

We never make it the same way twice, always just grabbing for whatever is on hand in the fridge to try and utilize our food in different ways. Sometimes it’s as simple as onion and celery, other times I toss in some pepper with the onion and maybe some artichoke, and sometimes I pull out some of our frozen veggies and toss a little broccoli and peas in.

This week I felt compelled to make an Italian-style salad with pepperoni, genoa salami, red pepper, and fresh mozzarella. Now normally I would add Italian dressing to the mix, but if you’re like me, this salad is always subject to all the ingredients (minus the pasta) dropping to the bottom of the bowl. And the more you mix, the more it goes.

But not this time. I was determined to incorporate Italian flavors from the dressing and create a cohesive dish. And it hit me: Creamy Italian Dressing! When I make a mayo-based macaroni salad the ingredients never fall to the bottom. Instead, the mayo acts as a cohesive and creates the perfect blend ratio of pasta to its edible accoutrements.

And I must say, it was a success! To add a little more zip, you can always whisk in a little bit of the regular Italian dressing. Trust me, the Creamy Italian will still do its thing. More importantly, before you serve, always make sure to add just a little dollop more of the Creamy Italian Dressing. When sitting in the fridge, the pasta has a tendency to sop up a lot of the liquid, so that little dollop rejuvenates the dish a little bit.

As always, enjoy!

– Jenny V


Jenn’s Creamy Italian Macaroni Salad

1 box rotini pasta, cooked and drained

1/4 – 1/2 cup pepperoni, diced

1/4 – 1/2 cup genoa salami, diced

1/2 container fresh mozzarella, quartered

1/2 red bell pepper, diced

1/4 cup vidalia onion, diced

1/2 cup Creamy Italian Dressing

1/4 cup Italian Dressing

Italian Seasoning


Directions:

1) In a large bowl, add pasta, pepperoni, salami, mozzarella, red pepper, and onion. Mix.

2) In a 2-cup measuring cup, add Creamy Italian and Italian dressing. Whisk together until smooth.

3) Add dressing over pasta and mix thoroughly. Sprinkle Italian Seasoning over mixture, just a few taps, and mix.

4) Cover and refrigerate minimum 4 hours to overnight before serving.

Now that’s a tasty meatball!

Coming from an Italian family (my maiden name being Corcione), I have witnessed several of my family members create their own recipes to make meatballs with their “Sunday Sauce”.

Yes, recipes. Because depending on the home I was eating at, whether it be my Pop-Pop & Grandma Gloria, my Aunt Annie & Uncle Mike, my cousins Fran & Rusty, my mom Michele, my Uncle Mark, etc.–the recipe would be different every time (and the results absolutely delicious!) I feel meatballs are a craft that one develops their own way, their own flair to it. Like snowflakes, no two methods are exactly alike.

Maybe one likes more egg, maybe it depends on the type of meat used, maybe parmesan is introduced, maybe a particular type of bread crumbs (or substitute if you’re gluten-free), maybe the seasonings vary, and depending on the region, even pignoli nuts or even possibly raisins. (Yes, raisins, this was a recipe I was raised on….it’s actually pretty damn good if you know how to incorporate them. And if you don’t believe me, Google it and see just how many recipes exist with this combination.) And just like my family, over time, I created my own meatball recipe based on the cooking knowledge that my family imparted through years of meals.

Matt, who spent several years in Italian catering, swears by these meatballs….which means a lot to me. Initially, when the both of us started to make macaroni & gravy (yes, gravy….and if you need reminding, I do have a post dedicated to this as well), this recipe was still in the works. We had tried ground beef so many times, trying to add the right ratio of eggs to bread crumbs & seasonings & parmesan, and then one night while making the gravy, I decided to try meatloaf mix….with a surprising result!

You will notice that I treat meatballs in a similar fashion to my meatloaf recipe, because I know that those ingredients flavor the meat in exactly the way I want. Unfortunately, it’s difficult to measure out this recipe as I consider making mixtures using chop meat a more “by feel” process, but just know that you want to have your mixture slightly sticky, but doesn’t stick to your fingers. That meatball mixture has to be moist enough to roll into balls and retain their structure.

Being able to keep with family traditions are important (especially if you have them). But even with traditions, making your own with your spouse, family, friends, etc.–that’s truly what life is about. I can’t wait until Matt and I have our own family and we can share recipes just like this one with them. And maybe, just maybe, they learn how to make their own traditions with their families.

Enjoy!

~Jenny V


Jenn’s “That’s a Tasty” Meatball Recipe

2-3 pounds meatloaf mix

1 packet Onion Soup mix

2 eggs (you can add 3, but just be mindful of the moisture, as you want these meatballs to retain structure while cooking)

Bread Crumbs (this is difficult to measure out, I’d say start with 1/4 cup and add as needed)

Italian Seasoning (if you use plain bread crumbs, add 2 tablespoons of this to the mix)

Worcestershire Sauce (again, something I don’t normally measure, but I’d say give that bottle about 8-10 shakes into the bowl….you can add 12 shakes if you’d like)

Parmesan Cheese (optional, but a great addition–add only up to 1/4 cup, if any)

Directions:

1) Pre-heat oven to 350 degrees. In a large bowl, combine all ingredients thoroughly until mixture is slightly sticky but does not stick to fingers too much. (Make sure not to overmix as that will warm the meat too much and make it super sticky.)

2) Roll meatballs into golf-ball sized pieces (or if you prefer a little smaller, you can do that too….go with what size you like, as long as you adhere close to the size of a golf ball). Place on sheet tray (or two) until all meat is used.

3) Bake in oven at 350 for 15-20 minutes, turning them at least once halfway through. Serve with spaghetti and sauce (and devour every last bite!)

The Basics of a Great Sauce…and Gravy

Growing up with the Italian side of my family, knowing how to make a gravy is key.

Yes, gravy, which is a tomato-based sauce with a veritable cornucopia of meat and seasonings in it cooked over an entire day. And if you don’t think there’s a difference between sauce and gravy, you are sorely mistaken! Sauce has no meat in it, gravy does and various kinds, I might add. Trust me on this, cooking gravy is a process that changes the texture and flavor in the most delicious of ways. (You also don’t want my family to argue with you on the sauce v. gravy debate….really, you will not win.)

I also realize most of us associate gravy as being brown in color and used for such things as roasts and mashed potatoes. Really, don’t argue with an Italian who calls their sauce gravy. Just accept that this is truth and you’ll be fine. You can debate with someone who isn’t Italian. :::haha:::

But we’re getting off track here….today is sauce (because there’s no meat in it) and how to make the most basic of sauces.

Last night, Matt and I decided to make grilled shrimp with pasta…and wanted a nice red sauce, but had no pre-made jars of sauce to use. (I know, sacrilege, but we both work so sometimes a jar is a nice convenience when we don’t have the time to dedicate to making a full-fledged sauce.) But no matter, we had a can of tomato sauce, seasonings, and a little ingenuity. It’s not like we haven’t made a quick sauce before. And with seafood, we were able to get a little creative with at least one or two of the ingredients.

Every family has their own way of making their sauce, so I’m happy to say that this is ours. I stand by this version time and time again, and I hope you will too….or at least make your own variation. The true foundation of a great sauce or gravy are the ingredients you put into it…one of them must be love.

Enjoy!

~ Jenny V

P.S. – On a side note, seafood does not count as meat….this is still a sauce!


Jenn’s “Not Your Average” Sauce

28 oz. can tomato sauce

2-3 tablespoons Olive Oil (just a little bit)

3 Garlic Cloves, minced

1/2 Onion, diced

2 tablespoons Italian Seasoning

1 teaspoon Salt

1 teaspoon Pepper

1/2 teaspoon Crushed Red Pepper (don’t need it, but this is my basic sauce and spice is nice)

1 tablespoon Basil (extra is always better)

1 teaspoon Sugar (oh yes, I’m not kidding–you need this one to make the salt flavor pop out more)

1 bay leaf (optional item, but definitely creates great flavor when added–just be sure to

1 can clam juice (this is optional, but if you are making seafood with your pasta, then you really can’t go wrong here)

Directions:

1) In cast-iron pot (or large pot) over medium-high heat, add in olive oil, allow to warm 1-2 minutes, then add in minced garlic and onion. Stir 2-3 minutes and allow aromatics to come out.

2) Add in remaining ingredients, bring up to a slight boil, then lower to simmer and cover with a splatter guard. Cook on medium-low for 15-20 minutes, stirring occasionally. Serve with pasta (or whatever you like).