“Squash”ing Gluten (in a delicious way)

Matt and I always love being presented with cooking challenges, one of which being how we can make some of our favorite dishes gluten-free. (Between the both of us, there are at least half a dozen people–friends and family–that have severe allergies and/or aversions to eating gluten!) So, this is a post for our favorite celiacs.

In the past year, I have urged Matt to try more vegetables than I am sure he has ever tried in his life. It became a game of sorts, going to the supermarket, picking up a random item in the produce aisle, and finding a way to incorporate said item into a meal. Brussel sprouts, rutabaga, parsnip, red cabbage, acorn squash, etc….trying each new item has brought us fun meals with tasty results. And one of my favorites? Butternut squash!

Initially when we tried butternut squash, I had purchased a frozen bag of already pureed squash for dinner. It was quite delicious (and a cool alternative to mashed potatoes.) But a fresh squash? Now that’s a horse of a different color! First off, the peeling took forever….and may have caused some colorful expletives to fly out of my mouth. But once it was done, then came the cutting into cubes and removing all seeds. If you’re looking for a good workout for your arms, then this is it.

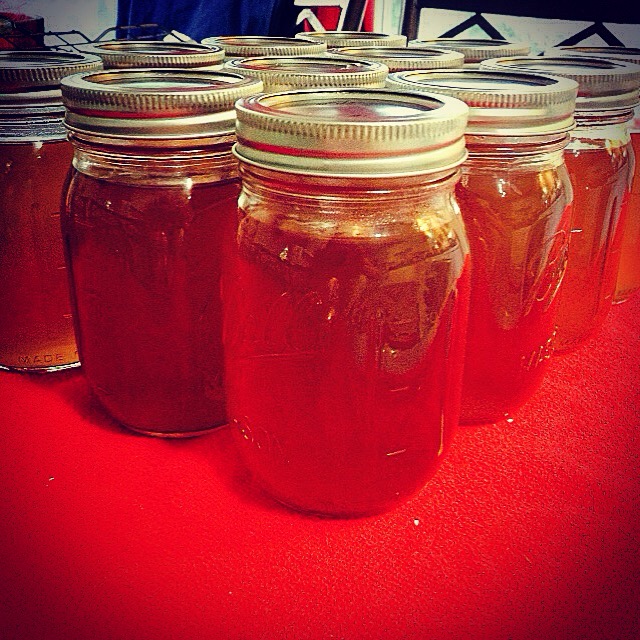
And from all of that hard labor came the best butternut squash soup that I have ever had! Now, for the gluten-free trick : while Matt and I used a roux (flour and butter) to thicken up the soup a little (because it was watery without that roux), we found that adding a potato yielded the same effect. Just add that potato in with your squash, cubed of course, and the starch creates a natural thickener. Also, make sure your stock is gluten-free! (This is where I would suggest checking out my homemade stock posts….because most cans of broth do come with gluten in them if you’re not careful. Labels are important. Trust me on this…it’s the difference between my brother-in-law’s wife being able to eat the soup we tried so hard to make gluten-free for her, but didn’t even think about the chicken broth having gluten in it.)

From time to time, we try to be as conscious as possible about other’s dietary needs…and still make a delicious meal!

So for all of you that are gluten-free (and those who just want to try a delicious soup)….

Enjoy!

~ Jenny V


Jenn’s Gluten-Free Butternut Squash Soup

1 2-3 lb. butternut squash, peeled & seeded

2 tablespoons unsalted butter

1 medium onion, diced

6 cups chicken stock

1 small potato, peeled and cubed

Nutmeg

Salt & Pepper

Directions:

1) Cut squash and potato into 1-inch cubes, set aside.

2) In large pot, melt butter. Add onion and cook until translucent, about 8 minutes.

3) Add squash, potato, and stock. Bring to a simmer and cook until squash is tender, about 15-20 minutes.

4) Remove squash and potato with slotted spoon, place in blender, and puree. Return blended mixture to pot.

5) Stir and season with nutmeg, salt, and pepper. Serve.

Advertisement

Spicy Tips: No more tears…maybe only a few

If you’re like me, chopping an onion is like bracing yourself for impact: you know the tears are coming and they won’t be pretty!

Matt and I have shared many moments where we have looked like we watched one too many sob stories after chopping one onion (or just making the first slice.) And mainly, we try to take pity on one another by trading off on who chops the onion for the next meal….the perks of being reasonable.

Onions are smelly, they make our eyes water, but damn if they don’t add some great flavor to a dish. A bag of onions really does not last in our house….lots of our recipes require it! (And sometimes, we just want caramelized onions on top of a perfectly-cooked steak…who doesn’t?)

And what to do when it’s already cut open and you need to store it? That onion goes bad real fast! But, thanks in part to our binge-watching of Jacques Pepin, I want to drop some culinary knowledge: when you chop/slice up an onion, be sure to wash it!

Onions have a layer of sulfur on them, which makes them decompose quicker if left on there. If you chop up the onion, then soak for ten minutes in cold water, drain, and pat dry with a paper towel, that onion will stay in your fridge for at least a week instead of only a day or two. And by then, you will most likely use it in other applications of food preparation! (But I do strongly recommend you use those onions within that time frame. If not, toss it. They don’t last forever and if your fridge is like ours, the cold spots tend to freeze certain items–like those onions. Frozen onions are not fun.)

With this tip, go forth and chop onions! (Erm–at least for dinner. Who chops onions for fun?)

And as always, enjoy.

~ Jenny V

Turning tea up to a calming notch…

I’m really becoming a big advocate of the freshly-brewed iced tea movement. While in childhood I did enjoy the mix (4C all the way), I am coming to find as I get older, I crave homemade iced tea more than water (only sometimes….er, maybe more than sometimes.)

The complexities of the flavor, the way the right amount of lemon slice and honey added could make or break that “perfect taste”….I’m an addict through and through.

Now, I’ve also come to love my French Lavender and its delicious (and soothing) qualities in my iced tea, so I sought out another freshly-brewed combination to incorporate said flavor. I was about ready to give up until in the back of my pantry, I located an unopened box (unopened?!? How did I miss it?) of Lemon & Ginger tea bags. And just like with all my teas, I decided to do a mixture of the Lemon & Ginger with some green tea to incorporate some soothing notes to that kick of citrus & spice. The end result being that my house smelled beyond heavenly and refreshing!

I had considered adding fresh ginger to the tea, but after consideration, I wanted to test out a batch without overloading my taste buds with that potent ginger flavor (and for those of you who have tried fresh ginger before, you know exactly what I mean!)

So my advice to you: if you want to add a kick to your tea (but not too much), temper it with a nice soothing flavor. You can’t go wrong.

Enjoy!

~ Jenny V


  Jenn’s “Om, Snap!” Iced Green Tea

10 bags Lemon & Ginger Tea

10 bags Green Tea

1 1/2 teaspoons French Lavender

1/4 cup honey

20-22 cups water

Directions:

1) In a large stock pot, put in water on high heat. Just before boiling, add in French Lavender in infuser ball.

2) When water is boiling, whisk in honey to incorporate (you can always add more if you’d like) and tea bags. Turn off heat, cover, and move off burner to allow to cool.

3) After 1-2 hours, transfer to pitcher and/or mason jars. Refrigerate overnight. Serve with lemon slice.

Attack Life with relish….I mean, salsa

Well, while it may be chilly for June, it is grill season in our house! Yes, once Memorial Day weekend arrives (maybe even a little before, but it’s a safe bet with Memorial Day), Matt starts aggressively grilling any and all meat that we get from the supermarket. It’s time to move the cooking from indoors to outside….and it does get delicious!

Now, before I get into talking about whatever new recipe Matt & I have thought up, I should preface our grilling adventures with the story about the death of our first grill. Our little two-burner Brinkman finally bit the dust last week when the bottom decided to catch on fire while grilling up chicken thighs.

Needless to say, those thighs got a lot of char (which we were able to peel off to utilize the delicious meat underneath) and so Matt wanted to not only purchase a new grill, but upgrade it as well. In the end, Lowe’s provided us the best deal on a brand new Char-Broil 3-Burner Grill with an ignition button. I swear, Matt looked like a kid with a new toy when we brought it home and set it up with the propane tank. And let me tell you, that first meal off of the new grill was simple (and sooooo delicious!)

Which brings me to tonight, when we picked up some beautiful boneless skinless chicken breast (especially since they were on sale this week, despite our best efforts to locate London Broil first) and figured it was time to fire up the grill! Last week’s purchase of fresh mangoes had us contemplating grilled mango with that chicken breast to amp up the flavors, but it was my suggestion of grilling red pepper as well that had me wondering: Why not make a salsa?

We had the mango, we picked up a nice meaty red pepper, and with a little bit of love from the grill, fresh chopped onion, and some seasoning….salsa became a success (and a colorful side!)

And little bit of a tip: if you are unsure of how to cut up a mango, Google is your friend. Trust me on this, because even my abilities to cut up a mango came from there (and I need to improve!) Also, just know that while grilling, you want to cook ithe mango cut side down and leave it in the skin until you are ready to prepare the salsa.

The best part about cooking is being able to share with all of you what I call the “first drafts” of a recipe. I feel like maybe next time it could use a little bit of jalapeno, possibly fresh cilantro, and a touch of citrus. But for a first time, I practically inhaled that salsa like I was going to the chair! (And great news for all of you Celiacs: it’s GLUTEN-FREE!!!!)

With June underway, move your dishes out of the kitchen and find ways to use that grill! (Or if you don’t have a grill–get one! You need a grill, it’s important and you will love what you can make on it.)

Enjoy!

~ Jenny V

Roasted Mango & Red Pepper Salsa

3-4 Mangoes, cut into large pieces

1 Red Pepper, halved and seeds removed

1/4 small onion, diced

1-2 teaspoons Dried Cilantro

Olive Oil

Salt 

Pepper

Directions:

1) Over a medium-high heat on grill, place red pepper halves skin side down. Drizzle a little bit of olive oil inside peppers. Grill until skin starts to peel away from pepper. Remove and chop halves into bite-size pieces. Add to large bowl.

2) Before mango goes on, make cross-cuts inside the mango with a knife. Once ready for the grill, place mango slices cut side down onto grill. Grill for about 2 minutes, then remove and once cool enough to handle, push on the skin to turn the mango inside out and remove meat from skin. Add to red peppers.

3) Add diced onions. Drizzle with a little olive oil, no more than a teaspon. Season with salt, pepper, and cilantro. Mix thoroughly and serve.

Spicy Tips: Save Your Fat!

As a fun addition to the recipes I share, I thought it was also imperative that I share simple tips!

Why? Because when I cook, these simple tips and tricks will save you a ton of aggravation (and make the food taste even better!)

So as my first tip to you, if you want to get the most out of food, you must utilize every part! Bacon is a prime example.

After cooking bacon, we’re always left over with the remnants of the fat/grease. And what is one to do with that grease?

Save it!

(I promise you, this has a delicious point.)

Bacon fat (along with duck fat) has this great flavor profile that lends itself to cooking leaner meats (i.e., ground turkey). Leaner meats have less fat and tend to dry out if you’re not careful, so adding a fatty quality to them is important. (And while I know there are health nuts who would say that this is a bad idea….using rendered fat is rather ingenious, no? It beats the hell out of the alternative of dry meat and you are utilizing something that we all normally throw away.)

So my advice to you is this: next time you cook bacon, save the fat and pour into a small glass (yes, glass, because plastic may melt if you pour hot fat into it), then cover and refrigerate. The fat will be easier to control when cold, especially when you can scoop a spoonful into a pan to help cook that ground turkey!

When you a get a chance, try it out!

Enjoy!

~Jenny V