A Garden of Love….and possibly some fresh mint

Before Matt & I became serious about being parents, we had talked about our hopes and dreams for things we wanted in our first home. Jokingly (but not really a joke) we needed at least 1.5 bathrooms. We wanted room to expand our family, a place we could express our own sense of style and flair. No pool (even though since we now have one we have come around on the idea of swimtime during the summer) and a space to throw summer barbecues whenever we could.

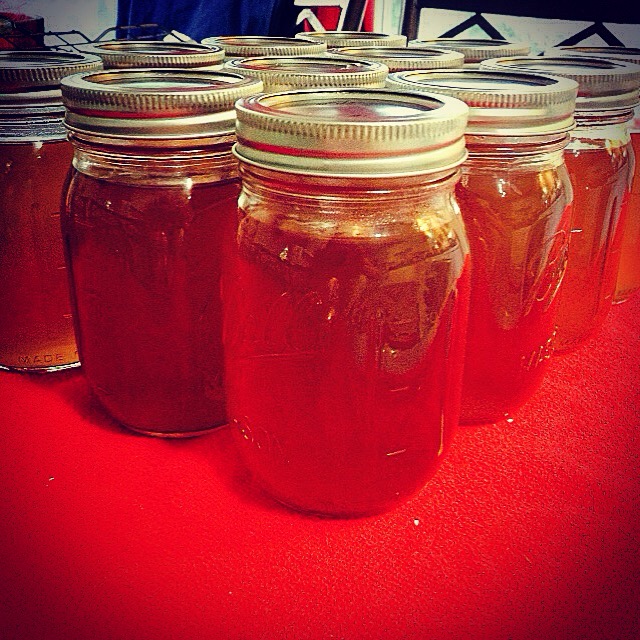
But more than anything else, Matt wanted us to have an herb & vegetable garden that we could use to our advantage. When we needed that little bit of basil or possibly a fresh tomato, what better place than to grab the necessities from our own backyard? Prior to our house-hunting whirlwind we had attempted a bucket garden at our year-round rental. We used big buckets with potting soil and wrapped chicken wire with stakes around it to keep rabbits and squirrels from tampering with our project.

While our attempt at vegetables yielded only one little measly yellow squash plant with fungus on it, we found that the herbs were a lot more abundant! (And you know, no fungus.) Thyme, rosemary, and dill grew like wildfire from just a few seeds, so we found ways to incorporate those herbs into more of our dishes. Chicken dishes, tuna fish, homemade tomato sauce….we found ways to use as much as of it as possible. Eventually we just couldn’t find the time to keep up with pruning and drying out our abundance, so the garden fell to the wayside.

Fast forward to now….where Matt & I finally have the home, space, and enough time to work on such a large project. And so since this idea was Matt’s brain child, he set out to bring this garden to life.

If you had looked at the list of our YouTube searches, you may have chuckled a bit at seeing “How to Build a Keyhole Garden” in between “Little Baby Bum” and “Baby Shark”. We discussed what herbs and vegetables would work best with the way we cook, as well as looking up articles and videos on the best options for growth.

With a goal in mind, Matt set to work on creating on our garden project. First came a handful of Home Depot trips to select the correct lumber, chicken wire, topsoil, and potting soil all while scoping out potential plants. Next, Matt started skillfully building a keyhole garden, making sure that the ground was even before setting down the cardboard for the bed of the garden and loading it with the proper soil mixture.
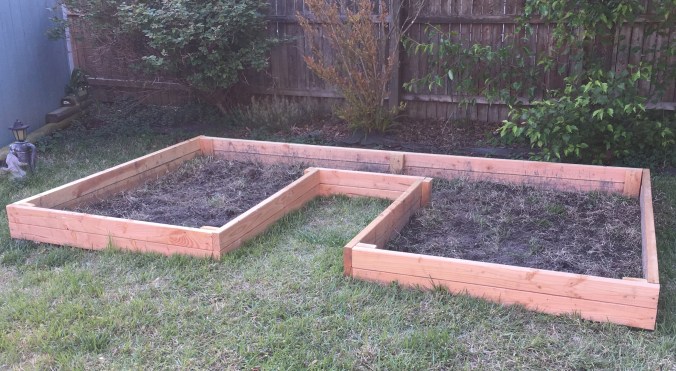
20190508_213349618_iOS

Starting our garden

And finally came the best (but most important part): selecting what we should grow in our garden. We wanted to have vegetables and herbs that we normally use in our cooking, as well as a few fun ones to try out in new recipes.

Of course the herbal basics (basil, rosemary, thyme, oregano, and parsley) were automatic shoe-ins for the main part of the garden bed. As a bonus, we added lavender, lemon balm, and sweet mint to round out the lineup. That holy trinity will be beneficial come iced tea/lemonade recipe time. And for that savory factor, lavender is one of the key ingredients in Herbs de Provence.

For vegetables, that became a little trickier but not impossible.

One of the best basics for a garden are tomatoes (even if it is considered a fruit). We decided on Roma tomatoes because they’re smaller than Beefsteak or Jersey, but are considered a good tomato for making homemade sauce. And usually smaller tomatoes are easier to grow, which means if this goes well maybe next year we’ll add cherry tomatoes to the mix.

Next came cucumbers, as my husband is half-Greek and I made pretty good homemade pickles using my great-grandmother’s recipe. There would need to be two types of cucumbers in our garden as the seedless are better for salads and tzatziki while Boston Pickling cucumbers are better for just that: pickling. And so we added those to our list.

With peppers we realized that while red bell are perfect for me as I am minimal on the heat and more on the sweet, Matt could get more into harvesting hot peppers for potential chili and just spicing up a few of our favorite dishes. By accident instead of grabbing four Tabasco pepper plants, we grabbed two Tabasco, one red chili, and one Santa Fe Grande plant. If all goes well, there will be very little need to replenish hot sauce.

For our final plant we had initially talked about spinach as Max has shown an interest in finally eating a green vegetable. (He ate spinach in Francaise sauce, which was a small victory in our house.) But since Matt could not locate a spinach plant anywhere, another great option was to attempt fresh romaine. With a handful of plants, we could pluck ripe leaves from the plant and have a salad without completely uprooting the whole plant. Sounded like a great compromise. Also, spinach is almost always on sale near us so that’s never a problem.

20190517_204257750_iOS

Ta-da….we have a garden!

The lineup was complete and with some configuring (and eventually re-planting of some of our crops), Matt & I worked together in bringing our garden creation to fruition.

We’re waiting with bated breath to make sure that crops start growing so we can harvest our end product and I can’t wait to share what we make when/if we do!

Stay tuned for potential recipe adventures and stories of our gardening experience.

And as always, enjoy!

– Jenny V


Advertisement

Spicy Tips: Back with a fun Iced Tea Tip!

It certainly has been a while since I have found time to sit down and write out new recipes. Being a parent has that ability to deplete any time you had hoped you would have to share your thoughts with others. (Just looking at the amount of drafts I have yet to finish is enough to give me palpitations….I need to do better.)

But never fear, I am back with a fun tip for those looking for ways to quickly make one of my favorite warm weather drinks: Iced Tea!

Now I have done the sometimes laborious process of making tea with hot tea bags, followed by whisking in honey to the warmed mixture to incorporate and a whole lemon or two to make one delicious drink! Yet sometimes, time is of the essence and if you’re short on time but still want to make that summertime nectar without using a pre-made mix, I’ve got a great solution!

So one of my favorite shortcuts to making an easy iced tea is all thanks to Lipton® and their fabulous Cold Brew Bags. (They’re in just about any supermarket and you can click here for some info: Lipton Cold Brew Bags). One bag per 4 cups of water (you will probably use 2 bags per pitcher, unless you want to add a flavor) and it only takes about 5 minutes of brewing time before it’s done. If plain tea isn’t enough and you want to add a flavor to it, you can always brew a few cups of hot water and add your flavored tea there, then mix the two together.

And if you’re like me, you want to add some flavor like lemon or honey/sugar to that mix. For a nice little hit of lemon flavor, I have to admit that my name is Jenn and I am an addict of the Arnold Palmer. For those of who you don’t know what that is, it is half iced tea and half lemonade mixed together. But for this purpose, I would recommend using maybe 1-2 cans of Minute Maid® Lemonade to one pitcher. (Not the frozen kind, but a can from a 12-pack. You can also get a carton or container of lemonade of any brand you like and adjust the amount of lemonade you put in to your liking.) Not quite the half and half of an Arnold Palmer, but leaves the iced tea with a nice sweetened lemon flavor that I know most of us love.

More importantly, it is a way to add sugar to your drink without the sweetness being too much. The lemonade blends nicely and if you still find that the lemonade makes it a little sweet for you, always remember the best part about iced tea are those ice cubes that clink around in the glass when you go to take a sip!

And as always, enjoy!

– Jenny V


Turning tea up to a calming notch…

I’m really becoming a big advocate of the freshly-brewed iced tea movement. While in childhood I did enjoy the mix (4C all the way), I am coming to find as I get older, I crave homemade iced tea more than water (only sometimes….er, maybe more than sometimes.)

The complexities of the flavor, the way the right amount of lemon slice and honey added could make or break that “perfect taste”….I’m an addict through and through.

Now, I’ve also come to love my French Lavender and its delicious (and soothing) qualities in my iced tea, so I sought out another freshly-brewed combination to incorporate said flavor. I was about ready to give up until in the back of my pantry, I located an unopened box (unopened?!? How did I miss it?) of Lemon & Ginger tea bags. And just like with all my teas, I decided to do a mixture of the Lemon & Ginger with some green tea to incorporate some soothing notes to that kick of citrus & spice. The end result being that my house smelled beyond heavenly and refreshing!

I had considered adding fresh ginger to the tea, but after consideration, I wanted to test out a batch without overloading my taste buds with that potent ginger flavor (and for those of you who have tried fresh ginger before, you know exactly what I mean!)

So my advice to you: if you want to add a kick to your tea (but not too much), temper it with a nice soothing flavor. You can’t go wrong.

Enjoy!

~ Jenny V


  Jenn’s “Om, Snap!” Iced Green Tea

10 bags Lemon & Ginger Tea

10 bags Green Tea

1 1/2 teaspoons French Lavender

1/4 cup honey

20-22 cups water

Directions:

1) In a large stock pot, put in water on high heat. Just before boiling, add in French Lavender in infuser ball.

2) When water is boiling, whisk in honey to incorporate (you can always add more if you’d like) and tea bags. Turn off heat, cover, and move off burner to allow to cool.

3) After 1-2 hours, transfer to pitcher and/or mason jars. Refrigerate overnight. Serve with lemon slice.

This tea is twisted (and soothing) in a delicious way

If there was a drink that I could drink practically every day (aside from red wine and coffee), it would have to be tea. Sweetened, unsweetened, Green Tea, herbal tea, etc…you name a tea, I most likely have tried it! (Fun fact: I get more excited about finding Tea Rooms over a bar….and Tea Rooms more times than not have delicious blueberry scones with clotted cream……mmmmmmmm) So it’s no surprise that when the warmer weather starts to peek out a little bit, I go for my various teas and herbs to create some fun new iced tea concoctions!

And especially when Matt is away for work purposes, the creative concoctions can get a little interesting, like my latest new love: French Lavender. Now, most of us know that lavender has an extremely soothing fragrance, but can also be applied to use in the kitchen. And thanks to my absolutely fabulous friend Julie, who purchased the French Lavender I had placed on our wedding registry, I got inspired to try out this aromatic in my standard recipe for iced tea!

With iced tea, I encourage experimenting. It doesn’t always need to be the standard. You can add herbal teas (and mix’em up), you can add honey, mint, lemon, different spices, etc. I always try to be different by making half of the tea bags I use a regular tea, while the other half are a flavor/specialty tea. It’s always nice to impart just a bit of flavor if you’re not too keen on going solely on one flavor.

The possibilities are truly endless! And to be different, try using Mason Jars instead of a giant pitcher. It looks prettier and also a great way to serve drinks for a party/get-together! (I unabashedly admit that four of those jars of Peach Lavender tea are already gone….three of them within a couple hours.)

While this is only one take, I encourage each and every one of you to try a variation and make it your own! And remember, the measurements I use don’t have to be what you use. Adjust accordingly to your own tastes, especially on the strength of the tea. But I do recommend a little extra water to boil first, because some of it will evaporate in the process.

Enjoy!

~ Jenny V


Jenn’s Peach Lavender Iced Tea

Ingredients:

10 bags of Black Tea

8 bags of Peach Tea

3-4 teaspoons French Lavender (if you have an infuser ball, I recommend using it for the lavender)

1/2 – 3/4 cup honey

20 cups water (in an 8 qt. pot)

Optional:

12 Mason Jars (in place of a pitcher)

Directions:

1) In an 8 qt. pot, pour water in and cover on high heat

2) Unwrap all tea bags and either twist all strings together or cut strings entirely (Note: it makes life easier if you cut the strings, especially since the bags will need to sit and brew for a while)

3) When water is close to boiling, put in French Lavender in infuser ball and place in water. (This will stay in even as tea steeps, but since the flavor is very delicate, you want to allow time for the lavender to impart flavor into the water.)

4) As soon as water is boiling, add honey and start whisking in (You want to put the honey in when the water is hot – it’s a great way to get sweetness in and the temperature of that water will allow for it to meld quicker.)

5) Place tea bags in water and turn off heat. Cover and allow time to steep, at least 15 minutes (or longer, if you prefer a stronger brew). Place pot on a towel or cool burner so that the tea has time to cool down before you put it in the fridge.

6) Once cooled slightly, ladle into mason jars, close with lid, and place in fridge for 2-3 hours before serving. Garnish with lemon.