When we received our cast iron Dutch Oven as a shower gift, Matt and I were not quite sure how to proceed with it….it’s heavy as hell! I mean, carrying that thing requires at least some weight-training, or a strong husband. But as we continue to use it, whether it be for cooking roasts, chili, turkey burgers, gravy for Sunday dinner (yes, gravy, Italians call it gravy), it has become our favorite toy in the kitchen….aside from the pasta press, but we’ll get to that later.
So today, as a change from our usual cooking methods for chicken thighs, I wanted to try them in the Dutch Oven, which brings us to braising. Now, for those who are not familiar, braising meat means that you use dry and wet methods of cooking. First you cook to sear in the juices, then in the oven it cooks in liquid.
Matt was on board with it, especially since he loves when I suggest new methods to cook our favorite foods. And the best part? Chicken thighs are dark meat, which means if you cook it longer, you won’t dry it out, due to its fattier content (never a bad thing, especially since that fat is jam-packed with flavor.) Now, the recipe I found had ingredients like fennel and red potatoes, so we varied it up a little bit and made this our recipe with the ingredients that we had in the house.
Feel free to change it up any way you like it, especially if you have a favorite veggie that you’ve worked with that cooks beautifully in the oven.
****And if you don’t have a dutch oven, use a deep pot, like a stockpot, and cover it with foil when you put it in the oven.****
Enjoy!
~ Jenny V
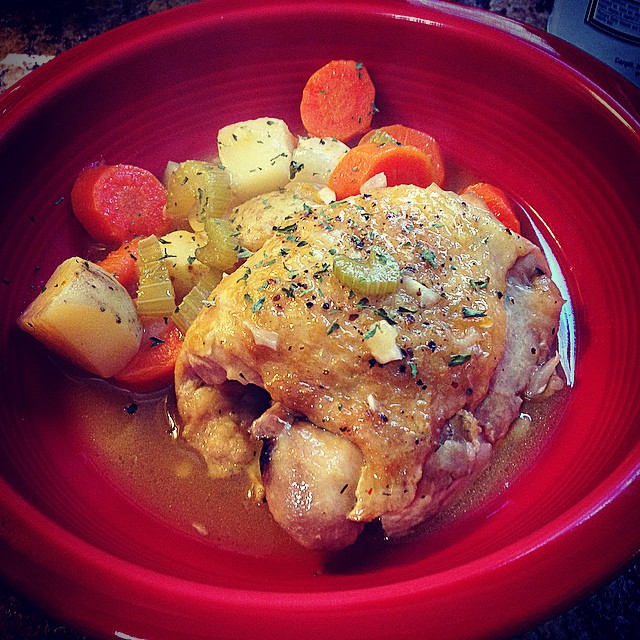
Braised Chicken Thighs a la Jenn & Matt
4-6 Chicken Thighs (you can trim the excess fat if you like, but not always necessary)
4 carrots, peeled and sliced
4-6 small potatoes, washed and cubed (we went with white potatoes, which gives a thinner sauce, but you can thicken it up with red potatoes)
1 medium onion, chopped
2-3 stalks celery, chopped
1-2 cloves of garlic, minced
1 can of chicken broth (a cup)
1/2 cup of Marsala cooking wine (any cooking wine you prefer will work, be creative!)
1 tablespoon thyme
dash of red pepper flakes
1 bay leaf
salt & pepper to taste
Olive oil
1) In the cast-iron, heat up 1 tablespoon olive oil on medium-high heat (closer to high, because you want a sear on the chicken)
2) Season the chicken thighs with salt and pepper on both sides, then place skin-side down in the cast iron first, browning them on both sides. Once browned, remove thighs and place on a plate.
3) Drain some of the fat from the cast-iron until only about a tablespoon remains, place back on heat and throw in the potatoes, onions, celery, and carrots first, cooking until they start to brown. When they start to brown, throw in the garlic. Cook until garlic browns.
4) Once garlic browns, add chicken broth, cooking wine, thyme, red pepper flakes, and bay leaf to the vegetables. Be sure to scrape the bottom of the pot for all that residual yummyness!
5) Place the chicken thighs on top in the cast-iron, keep on heat until liquid comes to a boil, then cover and place in oven at 350 degrees for 45 minutes to 1 hour.
6) Once it’s done, remove the bay leaf and serve with a little bit of the braising liquid over the chicken and the vegetables….yummy!
